Thursday, December 23, 2010

Bluetooth ... Phone

I had this idea for a few years now,  to make an old land line phone with REAL BELLS work as a bluetooth headset for a cell phone.  Now I can't take full credit for this as I heard of Steve Wozniac built one of these years ago.  I loved the idea, and wanted to build my own.

Version 0.1 (previous version)
Simple handset from phone with bluetooth headset mounted inside.  Very simple yet very eerie looking.
 
Version 0.2 has (Current Version)
1.  Tabletop touch tone phone.
2.  Dial tone.
3.  Ability to dial out.
4.  Working bells.
5.  10 cell NiMh battery pack.

Version 0.3 will feature (Researching/parts gathering)
  All of Ver 0.2 plus following
1.  Working rotary dial
2.  10 cell Sanyo Enelope battery pack.
3.  Ext charger.
4.  Auto/on switch.

Version 0.4 (planning)
  All of Ver .3 plus
1.  Internal charger.
2.  flashing "ringer" light.
3.  Ringer "silent" switch
4.  Dial light via red LED
5.  handset posts light via red LED
6.  Internal Voltage regulating power supply, for continuous operation.
7.  Universal External 12v/2a power supply.

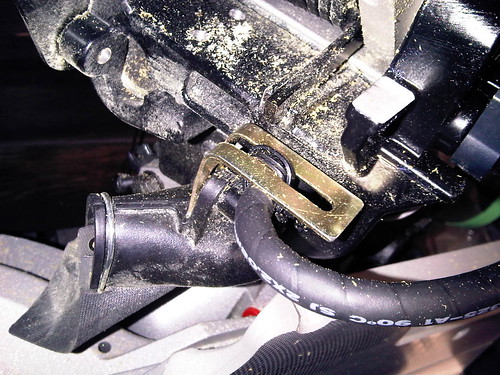
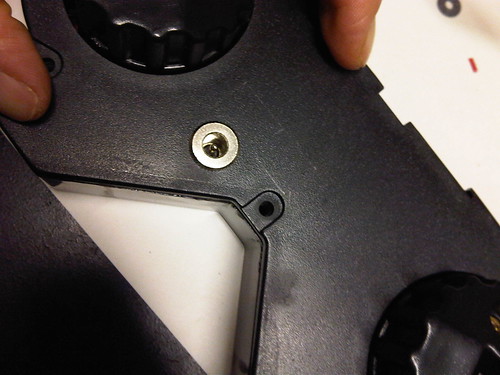
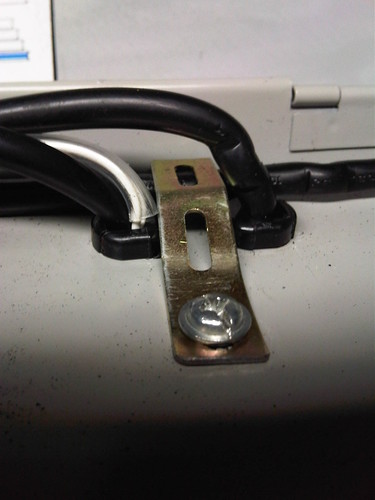
Current model notes.  Current 0.3 version trying to invent a way to mount the batteries.  Best idea so far is to use 4-40 long bolts through the bottom and zip tie the packs to them, best semi- permanent mounting solution.  Mounting the circuit boards are nearly the same way, using 4-40 screws with stand-offs.  The Auto/on switch refers to the ability to have the device auto power off when charging plug is inserted into a "switched dc power jack".  To get the rotary dial to work with the bluetooth board I have, I used a pulse-tone converter.  The bluetooth board i'm using is the cobra Phonelinx.  Which has been disassembled and soldered in power and phone lines.  Later models I might desolder the board LEDs and mount them else where, but since I want this to mainly be obscure, I made it so you can only see them from underneath via small drill holes in the phone.

Future Ideas

To make a "ringer flashing light" I thing i'm going to use a Radioshack neon bulb and mount, but use it only for the mount as it has the "look" that i want for a domed light.  but since a neon would take more draw that needed and not be very bright.  I will use a super bright red LED with a 100k resistor wired in parallel to the ringer.
   The "Dial light" i'm still researching.  An idea that came to me the other day was to use license plate bolts with LEDs already mounted in them, then to use a black rebar cover with a hole to cover the bolt, solving the mounting and the look as well as making it a fast solution.  I cant mount LEDs from behind as there is to much mechanical gearing in the way from the dial.  But using plastic fiber optic might be a future possibility.
   The idea of using an internal charger is to be able to plug this unit in and have it work just like a desk phone and never have the battery die.  Even though this adds complexity and cost, this really makes it a set it and forget it extension of your phone.  This will also make it so you can use any dumb 12v cord that can supply 2a of current to run/charge the phone, i.e. in the car.
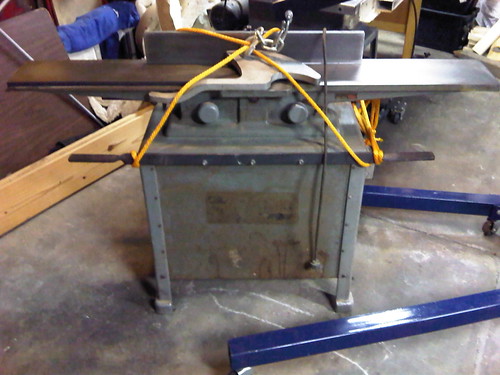
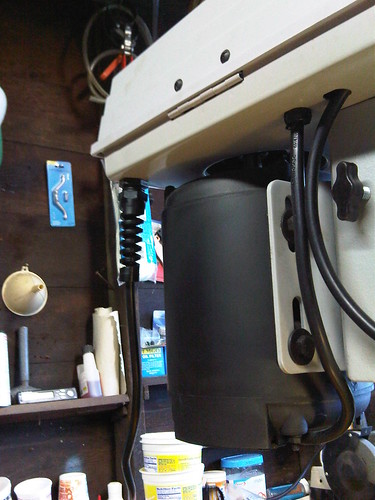
Pictures

Work in progress as of 12-23-10

Craftsman Professional 13" Planer

Yet another Craigslist find. Model 351.217430.  Which isn't that old, yet kinda hard to find much about it online.

No Mods planned.... Yet
Just refurbishing.

1.  Order replacement parts that were missing or damaged.  (Done)
2.  Clean up and re-oil machine.  
3.  Add new parts.

In progress as of 12-23-10

Tuesday, December 07, 2010

Restoring a Heston & Anderson 6" Jointer Model# 8650

This nice tool has a 60" table all cast iron and 3/4 enclosed cabinet.  It houses a B-line ( Brown-BrockMeyer Co. ) 3/4HP Motor. Frame #RM-720-R

Things I need to fix Mod.

1.  Motor mount bushings.
2.  Industrial switch add-on.
3.  Rewire with 12Ga cord.
4.  4" Dust collection cover.
5.  Find new blades.
6.  Replace switch with industrial style switch.

1.


Temp. blurry cam image...


As of 01/02/10 ... Post in progress, project currently on hold.

Rebuilding/Modifying a Delta contractor saw model 10 (34-410)

Just got this saw with a 50" Biesemeyer fence and router table insert.  Found this great deal on Craigslist.  When I got this thing hole and powered it on I noticed there was a problem.  The arbor bearings were bad. Took me a few days to figure out a good way to replace those.  Finally I decided to use a bearing puller separator from Harbor Freight.  Not that I wanted to but because they were the only ones that had a tool big enough and long enough to pull them off and pull the new bearing all the way on again.

next up is the mods.

1.  PALS system add-on.
2.  Industrial power switch mod, akin to my drill press.
3.  Built in 12ga extension cord for Table saw and router add-on.
4.  Build on a folding extension table.
5.  Build in dust collection for both router and TS.
6.  Add Industrial switch for router.
7.  Add more drawers for storage.

1.  This Product from In-Line Industries seems like a great idea.

2.  Again I used the switch from a craftsman product.  And to meet electrical requirements I got it out of a matching powered table saw of

Obviously in progress...
As of 12/7/10

Monday, November 15, 2010

Cyclone Cleaning

Forget dyson, how about putting a cyclone separator on a shopvac.  This makes any vac a 2 stage machine.  Check out it out here.

I can't wait to get one and make a cart for both.

Wednesday, November 10, 2010

Modifying a DeWalt DW718 CMS

I recently bought this saw from Home Depot after it went on sale to include the DeWalt stand (DW723).
After assembling it, i noticed a few things I wanted to modify.

1.  The power cord comes off the back of the motor, Change that to out the slide rail tube. (Finished)
2.  Make something to help catch the dust (Researching)

1.  This, I thought was just a cheap way to make the power cord come off the saw.  On the Ridgid 12" CMS it comes out the slide tube.  The reason the Dewalt didn't do it this way is there is very little room as they wanted the saw to make very tight (60*) miter cuts and have very high clearance.  Since I don't need that I don't really care, just as long as I can make a 45+-2* I'll be fine.  So I cut thick pipe strap and bent it 90*.  and use the saw dust port holder screw.  Then used a "P" cable clip and a M4-20 bolt washer and a nut.  to protect the cable I'm using spiral cable wrap.

2.  The best thing I can think of is a big plastic tub with a hole in the bottom for a vacuum hook up.

Photos:

Monday, November 01, 2010

Modifying a Delta 17-950L Floor Drill Press

I recently acquired this tool as it was being clearanced out of my local hardware store.  On arrival home I noticed some thing I wanted to change before putting this machine into full operation.

1.  Change the switch to something that's more of a real switch. (Finished)
2.  Wire lamp into mains. (Finished)
3.  Make laser also work from mains. (Finished)
4.  Add mobile base (she be a heavy beast) (postponed - need plywood)
5.  Reroute power cable to behind motor so it is out of the way of the rack. (Finished)
6.  Modify table tilt bolt to have handle (postponed {requires press to work})

1.  The switch I always liked for heavy duty power tools I found on a Craftsman Professional drill press.  I sourced them for replacement parts, the switch, cover, and "off" paddle cost me $22 with shipping Here Model# 152229010, parts in diagram #50, 51, 52.  I Initially thought this change over would be very simple as it looked like it just might fit. on arrival, it did not.  So I decided to take out the original switch, and use the original metal plate as a mounting bracket for the the new one.  I used a Dremel an a cutting wheel for the rough cut, the grinder wheel for fitment.  Its not pretty, but it doesn't matter as it will not show up.  Next I drilled the holes after aligning where I wanted the final placement.  Then tapped them with a M4 .7 tap. and used M4-25 bolts with washers.  Be sure to use washer behind the switch as it needs space as the overhang of the cover wont let it mount securely.  I used 4 washers. This modification also aids in future upgrade to 220 mains when you want to upgrade the motor.


2.  I used the old hole that used to be the one for the main power cord. Since it will now be move to the back of the machine. this opens up for the lamp cable to be routed into the front panel.  This also requires modifying the metal cable stays.


3.  This requires the use of a very small 9v adapter.  I'm using one from an old defunct answering machine.   I mounted the adapter with a hose clamp and thick pipe strap steel plate. It was trick to get the adapter and the switch to fit with the adapter in the housing.  I ran the 9v cable through 1/4 tubing to reduce risk of harming cord. I also ran this cord through with the lamp cord strain relief.


4.  I found the HTC-2000 to fit the bill with layers of plywood for a base.  Found it on amazon HERE.


5.  This is something that just makes me scratch my head on why they didn't do this.  Put the exit of the power cord clear in the back past the motor.  I used a screw on cable strain relief from McMasterCarr 69915K64
drilled a hole in the back near the motor.  I used a Lennox 3/4" Bi-metal hole saw to make the hole for this strain relief.


6.  This will take a bit of machining skills.  To make this I have drawn out how to make it.  So far the idea is to use the same handles they use on the bottom of the table including the spring loaded part.

As of 12/10/10

3D Printer update

Wow, nearly a year ago I posted my Interest into owning a FDM.  Well that dream is starting to finally take shape.  I have already started sourcing parts to build a RepRap II aka Mendel. Currently I have already cut the bar and threaded rod, and about half of the assembly is done.  Things I still have to do are finish construction of the chassis, get the electronics, and figure out how to make the extruder.  Right now I have put this project on short hiatus till I have a few other things done that in turn will also help build this machine.  Otherwise I hope to have this project completed before the end of the year. (I will add photos soon.)