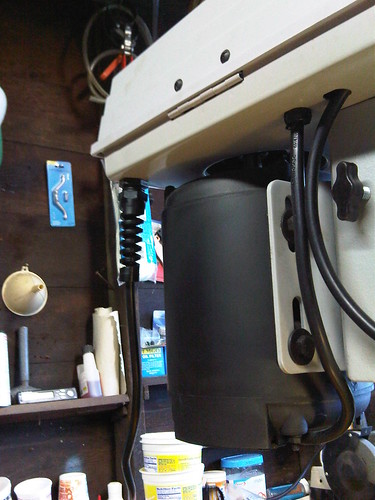
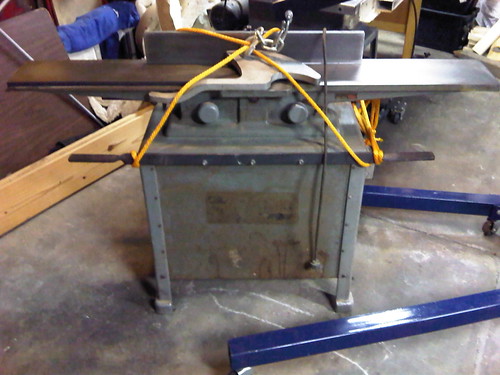
This nice tool has a 60" table all cast iron and 3/4 enclosed cabinet. It houses a B-line ( Brown-BrockMeyer Co. ) 3/4HP Motor. Frame #RM-720-R
Things I need to fix Mod.
1. Motor mount bushings.
2. Industrial switch add-on.
3. Rewire with 12Ga cord.
4. 4" Dust collection cover.
5. Find new blades.
6. Replace switch with industrial style switch.
1.
Temp. blurry cam image...
As of 01/02/10 ... Post in progress, project currently on hold.
The Illogic of the world is driving me crazy! Thoughts and ideas of someone trying to make sense of it all.
Tuesday, December 07, 2010
Rebuilding/Modifying a Delta contractor saw model 10 (34-410)
Just got this saw with a 50" Biesemeyer fence and router table insert. Found this great deal on Craigslist. When I got this thing hole and powered it on I noticed there was a problem. The arbor bearings were bad. Took me a few days to figure out a good way to replace those. Finally I decided to use a bearing puller separator from Harbor Freight. Not that I wanted to but because they were the only ones that had a tool big enough and long enough to pull them off and pull the new bearing all the way on again.
next up is the mods.
1. PALS system add-on.
2. Industrial power switch mod, akin to my drill press.
3. Built in 12ga extension cord for Table saw and router add-on.
4. Build on a folding extension table.
5. Build in dust collection for both router and TS.
6. Add Industrial switch for router.
7. Add more drawers for storage.
1. This Product from In-Line Industries seems like a great idea.
2. Again I used the switch from a craftsman product. And to meet electrical requirements I got it out of a matching powered table saw of
Obviously in progress...
As of 12/7/10
next up is the mods.
1. PALS system add-on.
2. Industrial power switch mod, akin to my drill press.
3. Built in 12ga extension cord for Table saw and router add-on.
4. Build on a folding extension table.
5. Build in dust collection for both router and TS.
6. Add Industrial switch for router.
7. Add more drawers for storage.
1. This Product from In-Line Industries seems like a great idea.
2. Again I used the switch from a craftsman product. And to meet electrical requirements I got it out of a matching powered table saw of
Obviously in progress...
As of 12/7/10
Monday, November 15, 2010
Cyclone Cleaning
Forget dyson, how about putting a cyclone separator on a shopvac. This makes any vac a 2 stage machine. Check out it out here.I can't wait to get one and make a cart for both.
Wednesday, November 10, 2010
Modifying a DeWalt DW718 CMS
I recently bought this saw from Home Depot after it went on sale to include the DeWalt stand (DW723).
After assembling it, i noticed a few things I wanted to modify.
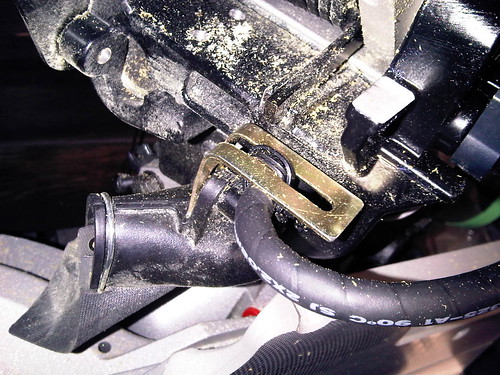
1. The power cord comes off the back of the motor, Change that to out the slide rail tube. (Finished)
2. Make something to help catch the dust (Researching)
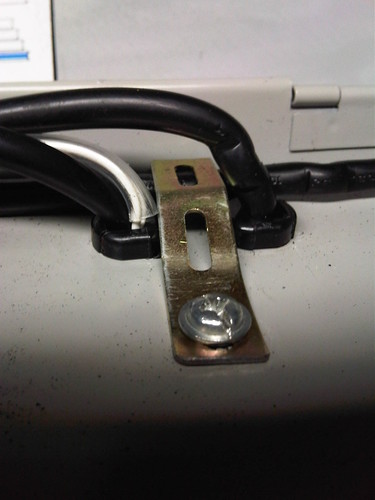
1. This, I thought was just a cheap way to make the power cord come off the saw. On the Ridgid 12" CMS it comes out the slide tube. The reason the Dewalt didn't do it this way is there is very little room as they wanted the saw to make very tight (60*) miter cuts and have very high clearance. Since I don't need that I don't really care, just as long as I can make a 45+-2* I'll be fine. So I cut thick pipe strap and bent it 90*. and use the saw dust port holder screw. Then used a "P" cable clip and a M4-20 bolt washer and a nut. to protect the cable I'm using spiral cable wrap.
2. The best thing I can think of is a big plastic tub with a hole in the bottom for a vacuum hook up.
Photos:
After assembling it, i noticed a few things I wanted to modify.
1. The power cord comes off the back of the motor, Change that to out the slide rail tube. (Finished)
2. Make something to help catch the dust (Researching)
1. This, I thought was just a cheap way to make the power cord come off the saw. On the Ridgid 12" CMS it comes out the slide tube. The reason the Dewalt didn't do it this way is there is very little room as they wanted the saw to make very tight (60*) miter cuts and have very high clearance. Since I don't need that I don't really care, just as long as I can make a 45+-2* I'll be fine. So I cut thick pipe strap and bent it 90*. and use the saw dust port holder screw. Then used a "P" cable clip and a M4-20 bolt washer and a nut. to protect the cable I'm using spiral cable wrap.
2. The best thing I can think of is a big plastic tub with a hole in the bottom for a vacuum hook up.
Photos:
Monday, November 01, 2010
Modifying a Delta 17-950L Floor Drill Press
I recently acquired this tool as it was being clearanced out of my local hardware store. On arrival home I noticed some thing I wanted to change before putting this machine into full operation.
1. Change the switch to something that's more of a real switch. (Finished)
2. Wire lamp into mains. (Finished)
3. Make laser also work from mains. (Finished)
4. Add mobile base (she be a heavy beast) (postponed - need plywood)
5. Reroute power cable to behind motor so it is out of the way of the rack. (Finished)
6. Modify table tilt bolt to have handle (postponed {requires press to work})
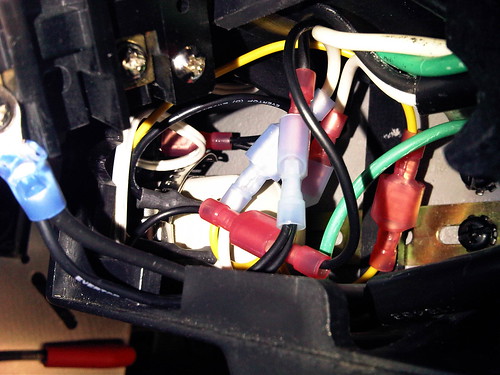
1. The switch I always liked for heavy duty power tools I found on a Craftsman Professional drill press. I sourced them for replacement parts, the switch, cover, and "off" paddle cost me $22 with shipping Here Model# 152229010, parts in diagram #50, 51, 52. I Initially thought this change over would be very simple as it looked like it just might fit. on arrival, it did not. So I decided to take out the original switch, and use the original metal plate as a mounting bracket for the the new one. I used a Dremel an a cutting wheel for the rough cut, the grinder wheel for fitment. Its not pretty, but it doesn't matter as it will not show up. Next I drilled the holes after aligning where I wanted the final placement. Then tapped them with a M4 .7 tap. and used M4-25 bolts with washers. Be sure to use washer behind the switch as it needs space as the overhang of the cover wont let it mount securely. I used 4 washers. This modification also aids in future upgrade to 220 mains when you want to upgrade the motor.
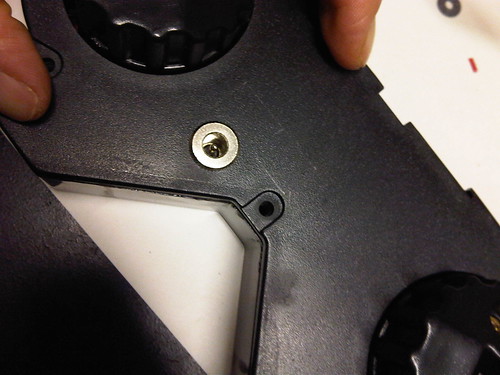
2. I used the old hole that used to be the one for the main power cord. Since it will now be move to the back of the machine. this opens up for the lamp cable to be routed into the front panel. This also requires modifying the metal cable stays.
3. This requires the use of a very small 9v adapter. I'm using one from an old defunct answering machine. I mounted the adapter with a hose clamp and thick pipe strap steel plate. It was trick to get the adapter and the switch to fit with the adapter in the housing. I ran the 9v cable through 1/4 tubing to reduce risk of harming cord. I also ran this cord through with the lamp cord strain relief.
4. I found the HTC-2000 to fit the bill with layers of plywood for a base. Found it on amazon HERE.
5. This is something that just makes me scratch my head on why they didn't do this. Put the exit of the power cord clear in the back past the motor. I used a screw on cable strain relief from McMasterCarr 69915K64
drilled a hole in the back near the motor. I used a Lennox 3/4" Bi-metal hole saw to make the hole for this strain relief.
6. This will take a bit of machining skills. To make this I have drawn out how to make it. So far the idea is to use the same handles they use on the bottom of the table including the spring loaded part.
As of 12/10/10
1. Change the switch to something that's more of a real switch. (Finished)
2. Wire lamp into mains. (Finished)
3. Make laser also work from mains. (Finished)
4. Add mobile base (she be a heavy beast) (postponed - need plywood)
5. Reroute power cable to behind motor so it is out of the way of the rack. (Finished)
6. Modify table tilt bolt to have handle (postponed {requires press to work})
1. The switch I always liked for heavy duty power tools I found on a Craftsman Professional drill press. I sourced them for replacement parts, the switch, cover, and "off" paddle cost me $22 with shipping Here Model# 152229010, parts in diagram #50, 51, 52. I Initially thought this change over would be very simple as it looked like it just might fit. on arrival, it did not. So I decided to take out the original switch, and use the original metal plate as a mounting bracket for the the new one. I used a Dremel an a cutting wheel for the rough cut, the grinder wheel for fitment. Its not pretty, but it doesn't matter as it will not show up. Next I drilled the holes after aligning where I wanted the final placement. Then tapped them with a M4 .7 tap. and used M4-25 bolts with washers. Be sure to use washer behind the switch as it needs space as the overhang of the cover wont let it mount securely. I used 4 washers. This modification also aids in future upgrade to 220 mains when you want to upgrade the motor.
2. I used the old hole that used to be the one for the main power cord. Since it will now be move to the back of the machine. this opens up for the lamp cable to be routed into the front panel. This also requires modifying the metal cable stays.
3. This requires the use of a very small 9v adapter. I'm using one from an old defunct answering machine. I mounted the adapter with a hose clamp and thick pipe strap steel plate. It was trick to get the adapter and the switch to fit with the adapter in the housing. I ran the 9v cable through 1/4 tubing to reduce risk of harming cord. I also ran this cord through with the lamp cord strain relief.
4. I found the HTC-2000 to fit the bill with layers of plywood for a base. Found it on amazon HERE.
5. This is something that just makes me scratch my head on why they didn't do this. Put the exit of the power cord clear in the back past the motor. I used a screw on cable strain relief from McMasterCarr 69915K64
drilled a hole in the back near the motor. I used a Lennox 3/4" Bi-metal hole saw to make the hole for this strain relief.
6. This will take a bit of machining skills. To make this I have drawn out how to make it. So far the idea is to use the same handles they use on the bottom of the table including the spring loaded part.
As of 12/10/10
3D Printer update
Wow, nearly a year ago I posted my Interest into owning a FDM. Well that dream is starting to finally take shape. I have already started sourcing parts to build a RepRap II aka Mendel. Currently I have already cut the bar and threaded rod, and about half of the assembly is done. Things I still have to do are finish construction of the chassis, get the electronics, and figure out how to make the extruder. Right now I have put this project on short hiatus till I have a few other things done that in turn will also help build this machine. Otherwise I hope to have this project completed before the end of the year. (I will add photos soon.)
Friday, October 30, 2009
3D Printing

I have seen a FDM (Fused Deposition Modeling) machine before and I was totally intrigued. After hearing about www.makerbot.com from Twit.tv from floss weekly. They explained their open sourced project and selling kits. But what really got my eye is that the RepRap project, that is the grandfather project of makerbot made version 2 called mendel. their first version put me off as I just never liked the problems it had, jamming, costly, hard to build. Now that a new version came out earlier this month, I looked at it and thought, yes this can be something I can build and use.
Thursday, March 05, 2009
Customer Relations...
oh boy where to start...
I think everyone knows the peril brick and mortar stores are facing as online retailers are snapping up business. Everyone knows the advantages of brick and mortar though. being able to see the product, making sure you have the right one and works for you need.
So today being the very nice weathered day it was i went to the garage to take the motorcycle for a spin. yet the faint oder of gasoline had me wondering what might have a leak. only to my dismay it wasn't the gas can i had hoped. To my surprise it was from the motorcycle main fuel line. so i got a screwdriver to close the stopcock on the gas tank. only to have a bit of gas gush from the screw. great i thought, there's the problem. so a bit later i went to the last parts place we have here to order a part and maybe get a few things to further a local business relationship with said shop. only to my dismay after them looking up the part to tell me that it would be much cheaper to buy this part online through their website they also use to sell parts. so i inquire what the difference would be if i just bought the part right now. so i get the run around of being told that the reason they make it cheaper so they don't have to serve people at the counter... then he starts to really push me saying just go home and order it... i couldn't believe what i was hearing... knowing there is no way to argue about this i said thank you and put the other stuff i was going to by on the shelf, and left. now that they have shooed me away as a customer, I'm going to buy from some other website that actually specializes in such a sale. they obviously didn't want my business when i came to them, and besides i saved almost $12. not only did they lose me as a customer, they lost my respect to recommend them to others.
I think everyone knows the peril brick and mortar stores are facing as online retailers are snapping up business. Everyone knows the advantages of brick and mortar though. being able to see the product, making sure you have the right one and works for you need.
So today being the very nice weathered day it was i went to the garage to take the motorcycle for a spin. yet the faint oder of gasoline had me wondering what might have a leak. only to my dismay it wasn't the gas can i had hoped. To my surprise it was from the motorcycle main fuel line. so i got a screwdriver to close the stopcock on the gas tank. only to have a bit of gas gush from the screw. great i thought, there's the problem. so a bit later i went to the last parts place we have here to order a part and maybe get a few things to further a local business relationship with said shop. only to my dismay after them looking up the part to tell me that it would be much cheaper to buy this part online through their website they also use to sell parts. so i inquire what the difference would be if i just bought the part right now. so i get the run around of being told that the reason they make it cheaper so they don't have to serve people at the counter... then he starts to really push me saying just go home and order it... i couldn't believe what i was hearing... knowing there is no way to argue about this i said thank you and put the other stuff i was going to by on the shelf, and left. now that they have shooed me away as a customer, I'm going to buy from some other website that actually specializes in such a sale. they obviously didn't want my business when i came to them, and besides i saved almost $12. not only did they lose me as a customer, they lost my respect to recommend them to others.
Wednesday, December 31, 2008
Photography
Saturday, February 16, 2008
New Posts
Yes i know I haven't posted in a while... but if you follow my Jaiku feed that has plenty of activity. I have been compiling a predictions list for 2008 for companies and trends. As for what i have been up to and not posting.. House renovations. i shall post updates at a later time of progress made. Till then, Chow
Thursday, June 28, 2007
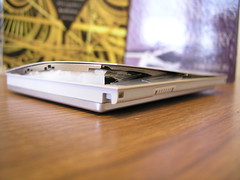
MacBook Pro Battery - Bloated
Well this was one of those... "it couldn't happen to me" things. One day i was using my notebook, when i noticed the battery icon flashing form charging to full and back every second or so... i knew something was up but i just thought a reboot would fix it. only to notice when i took it off its stand that the battery was about 2x times what it should be. so i called applecare and had it replaced. WTG SONY!... what will be your next blunder?
For more photos click here
Wednesday, June 13, 2007
A Hero Lost

Don Herbert was my greatest inspiration to the world of science. He Died yesterday @ 89 at his home in Bell Canyon after a long battle with multiple myeloma.
He was someone i wanted to meet, just never had the chance, and now never will.
Im sure he will be remembered by everyone he inspired all the years he did his tv show. to make people think how things work, why they work, and to experiment.
original story:
http://www.latimes.com/news/local/la-me-herbert13jun13,0,457794,full.story
Monday, April 09, 2007
It does exist
Well I thought this was just a photoshop on the net. Hah! Nope it does
exist. And no I don't have a clue why it has that name.
Sunday, February 18, 2007
Heaters, now air conditioners
Its still february ... we just had 15 inches of snow and its been below
freezing for weeks now.... and all the big box stores are getting rid of
portable heaters and getting airconditioners.. but they forgot last year
it snowed 6 inches oin the middle of march.... just to prove this...
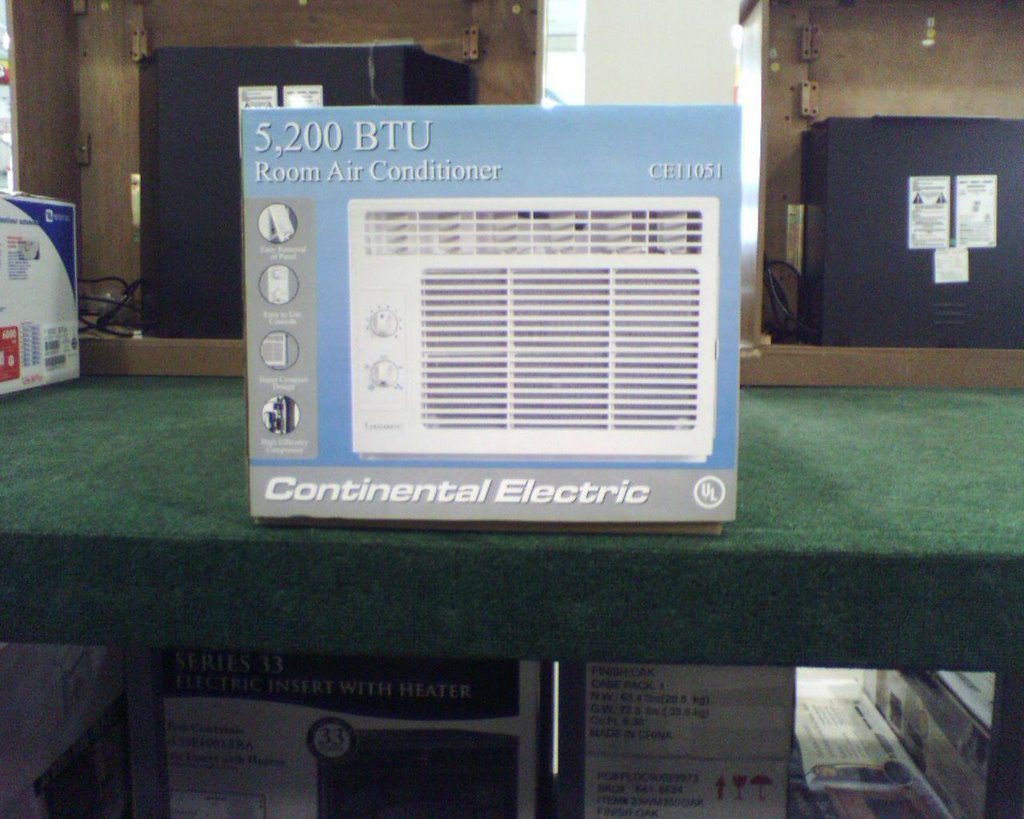
here is the first picture of the airconditioners that arrived at menards
feb 12
freezing for weeks now.... and all the big box stores are getting rid of
portable heaters and getting airconditioners.. but they forgot last year
it snowed 6 inches oin the middle of march.... just to prove this...
here is the first picture of the airconditioners that arrived at menards
feb 12
Wednesday, February 14, 2007
Casio GSHOCK MT-G
Well I finaly did it. I broke my coveted G-SHOCK. I only broke a band
pin so its already fixed. This watch has taken it all. Being thrown,
hit, whacked agaisnt things, been though an ultra sonic cleaner,
whacked agaisnt the side of an engine block while a wrench slipped. Yup
its been through a lot. And it still works like new. And no scratches
on the face!.. Wtg casio
pin so its already fixed. This watch has taken it all. Being thrown,
hit, whacked agaisnt things, been though an ultra sonic cleaner,
whacked agaisnt the side of an engine block while a wrench slipped. Yup
its been through a lot. And it still works like new. And no scratches
on the face!.. Wtg casio
Tuesday, February 13, 2007
Your name in space
How would you like to write your valentine on a space craft? well you can!
http://www.yournameintospace.org/
Saturday, January 27, 2007
i know i told about every friend i know about this but it just keeps getting better.
a company called Blendtec has a monster comercial belnd and they demonstrate that they can blend anything from ipods to glass marbles. very cool, i want one
here are the videos
http://www.youtube.com/profile?user=Blendtec
a company called Blendtec has a monster comercial belnd and they demonstrate that they can blend anything from ipods to glass marbles. very cool, i want one
here are the videos
http://www.youtube.com/profile?user=Blendtec
Wednesday, January 17, 2007
New spin on instant coffee


I read about these a while back 4 for 5 months ago and finally seen them
on the market. Its a cup of coffee or hot chocolate in a self heating
cup. It uses an exothermic reaction based on quicklime. Aka concrete.
You just open the bottom of the can. Push a button and then flip it
over and in 5-8 minutes it will be piping hot. I tried it today its
quite amusing. Yet incredibly wasteful. And a bit expensive for 9.5 oz
for $2.89 @ schnucks.
Subscribe to:
Posts (Atom)